






How to Automate Android Tasks: The Ultimate Guide to Mobile Efficiency 2026
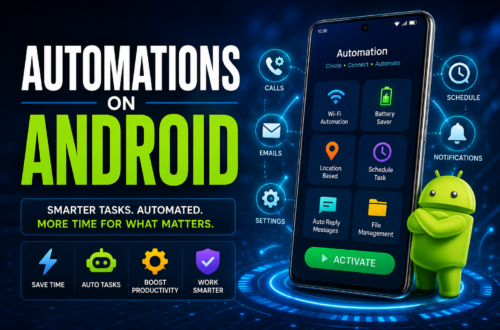
In this guide you will learnWe pick up our smartphones hundreds of times a day. Think about how many of those interactions are entirely repetitive: turning on Wi-Fi when you walk through your front door, silencing your ringer when you arrive at the office, launching a specific playlist when your phone connects to your car’s Bluetooth, or manually putting your phone into power-saving mode at night.
Doing these tasks manually is a subtle drain on your daily cognitive bandwidth. The beauty of the Android operating system lies in its openness. Unlike restrictive mobile environments, Android grants deep access to its underlying system mechanics. This allows you to transform your device from a passive tool into an active, automated assistant that anticipates your movements.
Whether you want to set up simple location-based changes or deploy advanced scripts that simulate screen taps without ever rooting your device, this guide covers everything you need to know about mastering Android automation.
The Core Framework of Mobile Automation 2026
Before diving into specific apps, it helps to understand the foundational logic that powers every automated system. Mobile automation relies on conditional programming structures. If you can map a workflow in your head using this structure, you can build it on your phone:
Triggers (The “When”): This is the event that sets the automation in motion. Triggers can be hardware-based (plugging in headphones, battery dropping below 20%), location-based (entering a geofenced area using GPS), time-based (9:00 AM on weekdays), or activity-based (opening a specific app).
Actions (The “What”): This is what your phone actually executes once the trigger fires. Examples include toggling system settings (Bluetooth, Wi-Fi), sending an automated text message, launching an app, adjusting brightness levels, or playing a sound.
Constraints (The “Only If”): These are optional conditions that must be met for the action to execute, preventing your automations from firing at inappropriate moments. For instance, you can set a trigger to run “When I arrive at the gym,” but add a constraint that reads “Only if the time is between 5:00 PM and 8:00 PM.”
Level 1: Native Android Automation (No Apps Required)
You don’t necessarily need to install third-party software to start automating basic tasks. Modern Android device manufacturers have integrated built-in routine managers that handle everyday configurations seamlessly.
Samsung Modes and Routines
If you own a Samsung Galaxy device, you have access to one of the most powerful built-in automation utilities available on any smartphone. Found under Settings > Modes and Routines, this feature uses a highly intuitive “If / Then” interface. You can set up conditions like connecting to your home Wi-Fi network to automatically keep your phone unlocked using Smart Lock, turn on sync settings, and switch your display to a high-refresh rate.
Google Assistant Routines
For non-Samsung users, Google Assistant provides standard ecosystem automation. Through the Google Home or Google Assistant settings, you can build routines triggered by specific voice phrases or time intervals. For example, telling Google “Good Night” can automatically silence your ringer, adjust your smart home lights, check your calendar for the next morning, and play white noise.
While native tools are excellent for battery efficiency and basic toggles, they lack the granular control required for deep app integration, conditional branching, or system-level variables.
Level 2: The Best Third-Party Android Automation Apps
To unlock true control over your phone, you need to turn to dedicated automation applications. The Android ecosystem features a handful of highly specialized tools catering to different skill levels and operational complexities.
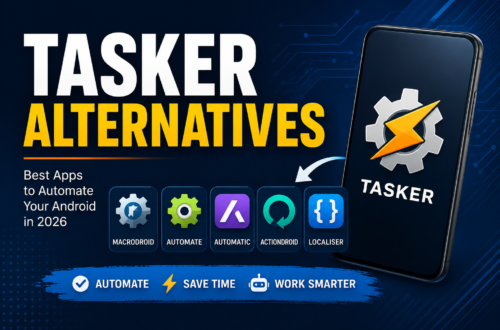
1. MacroDroid (Best for Beginners and Intermediates)
MacroDroid is the most approachable dedicated automation tool on the Play Store. It utilizes a clean layout split into the three distinct pillars: Triggers, Actions, and Constraints.
The app features an active community tab where users upload pre-configured macros. You can download these setups directly to your device, making it an excellent learning environment. If you want to build custom workflows without looking at code or complex logical trees, MacroDroid is your best starting point.
2. Tasker (The Definitive Power-User Choice)
Tasker is the undisputed king of Android customization. It offers an incredibly deep level of access, allowing you to create standalone Android apps out of your automation scripts. Tasker allows you to handle complex variables, manipulate arrays, and hook into developer-level APIs.
The learning curve is steep, and the user interface can feel intimidating to new users. However, if you want your phone to act as a web server, scrape data from websites, or execute complicated multi-layered logic, Tasker is the industry standard.
3. LlamaLab Automate (Visual Flowchart Modeling)
Automate takes a unique approach by trading list-based logic for visual flowcharts. You arrange blocks on a digital canvas—such as a block for “Check Battery Level” connected via visual lines to “If True” or “If False” decision points. This makes tracking intricate loops and multi-conditional branches highly visual and easier to troubleshoot for visual thinkers.
4. IFTTT (Best for Web and Smart Home Connectivity)
If This Then That (IFTTT) focuses primarily on cloud-to-cloud automation rather than deep on-device system toggles. It bridges the gap between your Android device and external web services. For example, you can create an applet that reads: If I take a new screenshot on my Android phone, then upload it automatically to a specific folder in Dropbox and ping my team on Slack.
Automation App Comparison Table
| Feature | MacroDroid | Tasker | Automate (LlamaLab) | IFTTT |
| Learning Curve | Gentle / Moderate | Steep | Moderate | Very Easy |
| Interface Style | List / Linear | Tabbed / Functional | Visual Flowchart | Single Applet Blocks |
| Variables Support | Basic to Intermediate | Advanced / Full Arrays | Programmatic Expressions | None (Cloud-reliant) |
| Root/ADB Required | Optional (For system logs) | Highly Recommended | Optional | No |
| Best Used For | Everyday on-device tasks | Enterprise-grade systems | Visual logic tracking | Smart home & web sync |
Step-by-Step Guide: Building Your First Automation Macro
Let’s build a functional, real-world automation that saves battery life and secures your phone when you leave the house. We want the phone to automatically turn off Wi-Fi, enable mobile data, and switch on battery saver mode the moment it disconnects from your home router.
Here is the exact sequential setup using a standard automation application:
1.Establish the Trigger:Setting the boundary.
Level 3: Advanced Rootless Power (Shizuku & ADB)
Historically, deep Android automation required “rooting” the device—a complex process that unlocks absolute administrative control but breaks security protocols, disables banking apps, and halts official system updates. Modern Android environments offer a brilliant alternative: Shizuku.
Shizuku is an open-source tool that allows user-installed apps to access system-level APIs directly using hidden developer operations. It achieves this by utilizing Android’s native Debug Bridge architecture (ADB) over a local wireless network connection.
What is ADB? Android Debug Bridge (ADB) is a command-line tool that lets computers communicate directly with an Android device to modify system configurations that are typically hidden from the standard user interface.
By pairing apps like Tasker or MacroDroid with Shizuku, you can automate advanced behaviors without compromising your phone’s security ecosystem:
System Logs Access (Logcat): Your phone constantly writes down its operations in a background file called Logcat. With Shizuku access, your automation tools can read this log in real time. This means you can create triggers based on internal actions, like firing a macro the exact millisecond a specific app fingerprint authentication fails.
Automated Screen Interaction: You can configure your phone to autonomously press buttons inside third-party apps, scroll down pages, or fill out web forms when you are not actively looking at your screen.
Secure Settings Overrides: Switch airplane mode, toggle global location services, change display resolutions, and manage deep battery preservation settings automatically behind the scenes.
High-Value Automation Recipes to Steal
If you are looking for ideas on how to immediately put your automation apps to work, implement these classic productivity recipes:
The Focused Workspace
Trigger: Phone hooks up to the office Wi-Fi network OR detects the location coordinates of your desk.
Actions: Set media and notification volume to 0%; enable Do Not Disturb mode; auto-launch your corporate communication app (like Slack or Microsoft Teams); set screen brightness to a static 50%.
Constraint: Only execute between Monday and Friday from 9:00 AM to 5:00 PM.
Smart Battery Protection
Trigger: Battery level reaches 80% while charging.
Actions: Trigger a smart plug integration via webhooks to cut power to the wall brick, or toggle the internal system charging speed down to a trickle. This prevents your lithium-ion battery from sitting at 100% capacity for hours overnight, extending its total operational lifespan.
The Commuter Hub
Trigger: Device pairs with your vehicle’s integrated Bluetooth system.
Actions: Launch your navigation app of choice; turn up media volume to 90%; turn on location services; use text-to-speech engines to read incoming text messages out loud automatically while you drive.
Troubleshooting: Surviving Android’s Battery Management
The number one hurdle beginners encounter when building Android automations is the system abruptly killing their apps in the background. Modern Android deployment utilizes aggressive power management algorithms designed to maximize battery life by forcing idle background apps to close.
If your macros stop firing reliably after your phone sits on a desk for an hour, your phone has likely placed your automation app into a deep sleep state. Follow these steps to resolve the issue:
Exempt the App from Battery Optimization: Navigate to Settings > Apps, select your automation application, tap on Battery, and switch the setting from Optimized or Optimized/Restricted to Unrestricted.
Pin the App in RAM: Open your recent apps screen, tap the application icon above the preview card, and select Lock this app. This instructs the operating system’s memory management system never to clear it out when system resources run low.
Allow Persistent Notifications: Keep the persistent notification enabled in your status bar. This acts as a vital flag to the Android system kernel, proving that the app is actively performing user-requested background services and should remain untouched.